Showing posts with label buttons. Show all posts

Sunday, November 20, 2011

Craft Fair Success

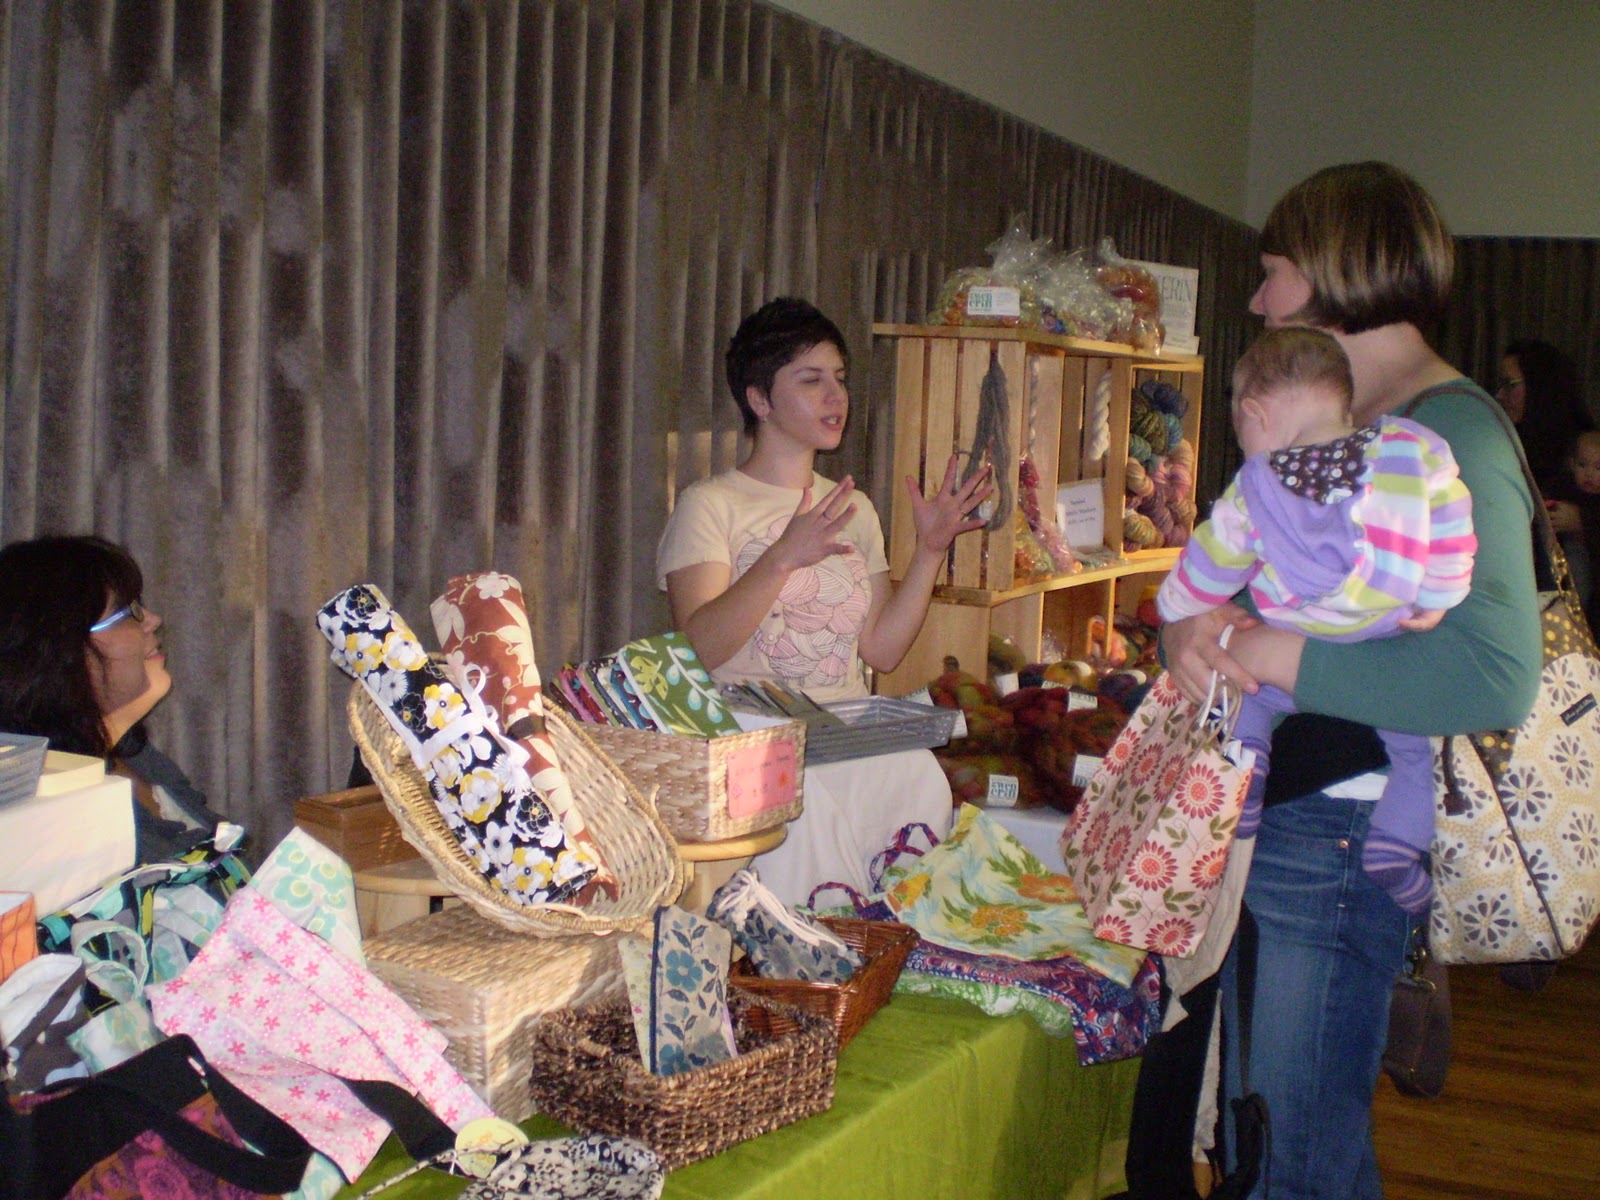
The Indie Knit and Spin craft fair was a successful first time event.  There were steady crowds and sales were surprisingly good.  I sold more buttons than I expected.  Joyce Compton also had good sales of her felting kits.  Things went well enough that I will consider doing other craft fairs. 
Knitters and spinners tend to be passionate about their craft.
The displays I built worked well.  I was particularly happy with the spinner display racks that are made from old floor lamps, scrap lumber and PVC pipe.
Small children were attracted to the buttons on the table cloth.  This photo was taken just before the doors opened.
All of the displays were made from recycled materials.


Monday, September 26, 2011

Button Display Boxes and Button Cards

This past weekend I worked at the Lillian St wood shop to make display boxes that will be part of my craft fair display and storage inventory system.  While I was there I also made some wood buttons.  The storage boxes are made mostly from recycled wood that has been languishing in my stash.  The side bars of the boxes are fun.  They are old rulers and paint stir sticks.  After taking the boxes home and filling them with button cards I realized that the boxes need to have a second bar lower on the side to prevent the button cards from falling out.  I'll do that next weekend. 
I also designed some button cards for my recycled and hand dyed buttons.  In the two cards on the ends of the photo I used images from vintage button cards.  I'm trying to express the idea of making old things new through creative reuse.  So my appropriation of these images to illustrate the button cards is in this spirit.  If you look carefully at these two cards you can see that the illustrator was suggesting uses for the buttons.  I took this thought and designed the card in the middle.  By sewing the buttons onto images of paper flowers I'm suggesting to scrapbook artists that they can use my buttons in their art.  I won't know until the Indie Knit and Spin craft fair if these cards are effective selling tools.

I like making the button cards because the process is making me learn how to do things with my software. 

Thursday, September 1, 2011

Branding and Packaging my Buttons

My current task is to work on how I package my buttons.
The theme that runs through my Etsy button shop is that I take old things and make them new.  I'm using old button making techniques in new ways.  I recycle old buttons by dying them. Etc.  I want to design some packaging for my buttons that reflects that theme.

Historically buttons have been sold on cards.  This is a card from the 1920s.  It looks to me like the card designer did the 1920s version of cut and paste.  I think the message is that these buttons are well made and fancy.
I'm not sure when the two cards below were produced.  Perhaps in the fifties?  The message conveyed is that using these buttons will enhance the user's gender role.  The roles portrayed are so extreme that they seem like caricatures to me.  It amuses me that on the man's card the designer has thoughtfully given us specific instructions on where to sew the buttons.     
Contemporary button card designs tend to be simple.  Often they just have the manufacturers logo.  I want to do more than that.  I want my cards to have a lot of personality.  Here is the current version of a card for my buttons.  I like the retro feel of the design and the pattern of how the buttons are arranged on the card.  Its an affordable to make button card.  The design is going to evolve.  I'm thinking of adding historical information about button making on the back and maybe some imagery.  I am also looking for a reasonably priced source of recycled card stock. 

Sunday, August 21, 2011

How to Dye Buttons

All of these buttons were white before dyeing. 
I'm expanding my line of dyed, recycled buttons in my Etsy button shop.  I'm working primarily with white buttons from my mother's and sister's button boxes.  They are typical old buttons saved from clothes and there are a lot of them.  
Marbled buttons dye well also.
It's not hard to dye buttons.  I use Rit liquid dye because it's readily available.  Here's the process that is working for me. 
1.    Wash the buttons and a small plastic container.  A 12 oz container works well.
2.    Put about an inch of water in the container.
3.    Heat water in a microwave until it boils.  Don't skip this step.  Dyeing doesn't work well without heat.
4.    Add liquid dye to the container.  Start by adding about 4 tablespoons.  You can always add more if the colors aren’t bright enough.
5.    Add 20-40 buttons.  The number will depend on the size of the buttons.  You want all of them to be submerged in the dye. 
6.    Let everything sit for 15 to 30 minutes.  Stir occasionally with an old chopstick or plastic spoon.
7.    Check the color of the buttons.  If you want the color to be darker let the buttons stay in the dye for a while longer.  Or add a bit more dye. 
8.    Remove the buttons from the dye with a plastic spoon.
9.    Pour what's left of the used dye & water mixture back into the bottle to reuse.  The contents of the bottle will be a bit diluted but it seems to work just as well. 
10.    The buttons must be well rinsed or they will stain fabric when wet.  I soak mine in a bucket of water overnight. 
11. Rinse till the water runs clear.
12. Let them dry.
13. Looking at your transformed buttons is the best part.
Fortunately there are lots of large buttons to dye.

And plenty of shank buttons.
 These buttons will be added to my shop stock over the next few days. 
Sunday, August 7, 2011

Stocking My Etsy Shop

I've been on a button making binge and have been adding to my Etsy button shop inventory.  It has taken me a while to figure out how to make fabric and fiber buttons in a way that is unique to me.  The technique that is working well is to learn about traditional button making techniques and then render those techniques with materials from my set of resources. There are a number of well established button makers on Etsy who do a good job of making cover buttons and sliced branch wooden buttons.  I need to find my distinct style to compete with them.  Happily my efforts seems to be working.  I am slowly beginning to get sales.  But there is much more to do.  I read that when shops have about 100 items in inventory sales increase.  I'm about halfway to that point.  Nor have I done any marketing with social media.  I'm waiting to do that until I have the enlarged inventory and an updated shop banner. It's a good thing that I have several years to build the shop before I retire.

The following three photos are examples of buttons made on plastic rings.  The traditional buttons were made in white on sheep's horn rings. I'm using up stuff that I inherited from my sister.  I really enjoy playing with the color.  As I get more experience I have a larger set of techniques to use and my craftsmanship is improving.  Best of all, I'm having fun.
Felt centers with a satin cording stitched onto a ring.
A fancy fiber button stitched onto large & small rings, stitched together & finished with a bead center.
These have the same 2 ring technique as those above with the addition of a knotted center.
This type of button was traditionally finished with a thread shank or no shank at all.  I'm using a cloth covered commercially made shank back.  It just feels like better craftsmanship to have a sturdy back.

This weekend I made my first wooden buttons.  They are made from a trim sample that was probably manufactured in the 1980's.  The trims are well made from an assortment of hard woods.  To make these buttons I laid out cut lines and the hole spacing.  I drilled the holes first with a drill press and then cut the buttons apart with a power miter box.  I realized that making wood buttons is hard because it means working with power tools on small pieces of wood.  I'm looking forward to making more wood buttons.
Toggle buttons about 1/4"x 1/2"x 1 1/2".

Thursday, July 21, 2011

Button Making

Anytime I need to sit (riding the Megabus) or want to sit (after work) I do some sort of hand work.  Lately I've been working on learning more about making buttons with centuries old European techniques.  I'm not trying to make reproduction buttons.  I'm exploring the old ways with the resources I have immediately available to me.
I find myself working in series that either explore the use of color or variations of technique.
In this series I'm working a color scheme with needle weaving and crocheting. 

These two photos show Dorset Wheel buttons in color and pattern variations.
This is my first successful star shirtwaist button.  I'm happy to have finally figured out how to make these!
This is an example of a lace shirtwaist button.  It was also a challenge to make.
As I practice and gain experience I expect these buttons will be easier to make and I will be able to get on with playing with color.  It is a lot of fun to figure all of this out.  After learning how complex these buttons can be, I have gained a great deal of respect for all the old button makers who made buttons for a living.  Over the next week I will be adding these and other buttons to my Etsy shop.  http://www.etsy.com/shop/EmilyEckel

Wednesday, July 13, 2011

Learning to Upholster

In my quest to acquire the skills to build a couch I need to learn something about how to upholster furniture.  Last week I made a couple foot stools to work on.  The old Bernina sewing machine is up to the task of sewing the heavy fabrics.  I'm getting more comfortable working with the upholstery fabrics.  I had assumed that I would be using a random patchwork style of upholstery but as I went to work on these foot stools I found myself doing patchwork that reflects the shape of the base of the stools. I liked what was happening and went with it.

Of course I will use a lot of buttons on my upholstery.  I love to make buttons and I can use these projects as a marketing tool for my Etsy button shop.  In these photos the buttons are not yet attached.  I'm still playing with where and how to position them.
I also need to figure out how to finish the cushions.  Should they be permanently attached to the base with upholstery tacks?  Should they be finished as pillows and attached to the base with Velcro?  As a learning experience I may do one cushion with each technique and then see what I think about the results.
My cat is not waiting for me to finish.

Sunday, May 22, 2011

Etsy Button Shop

Grindle button made on a cover button mold.
I find that the skill set required to run an Etsy shop is large.  The skills include mastering the mechanics of listing an item for sale, taking excellent photographs, establishing shop policies, shipping internationally, writing compelling item descriptions, designing attractive packaging,  marketing with on line techniques, etc.   All of these skills are important but secondary to developing a great product line that people want to buy.   For the last 4 months I worked on building my Etsy shop and decided it was time to evaluate my efforts to date.
Reinterpretation of the Dorset button.
The biggest weakness that I identified in my shop keeping was that I didn’t know who my customers were and what they want to buy.  My thinking moved to a new level when I defined my target market or ideal customer as people who like to make creative projects that involve fabric.  They are the DIY crowd, the crafters and other inventive souls.  I figured this out by observing who was buying what from the vendors at the Artistic Figures in Cloth conference.  These customers were not looking for finished products they were looking for unique supplies to use on their projects. 
Dorset cross wheel button & two recycled fabric buttons.
When this became clear I was able to find direction for developing my product line.  My task is to make unique buttons that crafters will want to use on their projects.  I realized that the way to make my buttons unique is to make the most of my unique set of interests, resources and skills.  After much research and experimentation I defined my product line as buttons that reinterpret preindustrial revolution button making techniques and/or use recycled materials. Old technology buttons include thread woven buttons, singleton cloth buttons, & natural material buttons.  Recycled material buttons include cover buttons made from repurposed fabric & hand dyed vintage buttons. 
Woven ribbon button.
 I'm excited and having lots of fun designing and making the buttons.  It will take a while to get the shop fully stocked.  It really helps to have a clearly defined direction for the shop.  
A vintage rhinestone button and two buttons made from recycled fabric.

Thursday, January 13, 2011

Art Doll Challenge - work in progress

Chris Fondi, Joyce Compton and I have given each other some challenges to work on for our joint show.  Joyce gave each of us a muslin doll to turn into an art doll.  It has absurd proportions, stupid joints, and a T shape pose.  I decided to take a fun approach.  I painted it dark blue and cover it with buttons. The face is a cover button that I made.  The hair is ball fringe.  (Ball fringe was on sale at Construction Junction.  I binged at $.75 a yard.)

I like the whimsicality of the doll and am thinking about having him juggle the cover buttons at his feet.  A button clown of absurd proportions!